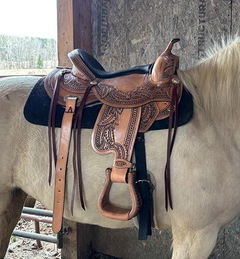
Leather Dyes, Finishes & Dye Prep
4 productsLeather dyes, antique stains, and dye prep products for western tack, saddles, and hand-tooled leather projects.


Leather Dyes, Finishes & Dye Prep Buyer’s Guide
Leather Dyes, Antique Stains & Finishes for Saddles, Tack, and Tooled Leather Projects
- Acrylic, water-based formula: Penetrates tooled and carved leather surfaces quickly, settling into recessed areas to create a natural antique effect without oil-solvent fumes.
- Professional antique finish: Highlights carved and stamped tooling patterns on saddles, headstalls, breast collars, and custom leather goods — results in minutes, not hours.
- Available in multiple colors: Black and tan color options allow matching to existing tack finishes or layering for custom aged looks on western leather projects.
- Large-format sizing: The 32 oz bottle provides enough product for workshop-level use — saddle repairs, tack restoration, or ongoing leather crafting projects without frequent reordering.
How to Choose the Right Leather Dye or Antique Stain
Acrylic vs. Oil-Based Stains
Acrylic, water-based stains like Fiebing's Antique Leather Stain are easier to apply, clean up with water, and dry faster than oil-based alternatives. They work especially well on vegetable-tanned leather where the dye needs to settle into tooled recesses for a defined antique effect. Oil-based products offer deeper penetration but require longer dry times and solvent cleanup.
Color Selection
Black antique stain creates high-contrast definition in carved patterns — popular for show saddles and decorative headstalls. Tan antique stain produces a warmer, more subtle aged tone that suits natural or light-brown leather. When restoring existing tack, match the stain color to the base leather tone rather than the darkest carved detail.
Surface Preparation
Clean the leather thoroughly before applying any dye or antique finish. Remove grease, old conditioner residue, and surface dirt — any residue can block penetration and create uneven color. A dedicated leather dye prep or deglazer step is especially important on previously finished or conditioned leather surfaces.
Why Prep Steps Matter When Dyeing Western Leather Tack
Riders and leather crafters who skip the prep step often end up with blotchy, uneven color — particularly on full grain harness leather that has been previously conditioned. Cleaning and deglazing the surface before applying antique stain allows the acrylic formula to absorb evenly across tooled and carved areas. On saddles and headstalls, this means crisp, well-defined contrast in the tooling rather than a muddy, flat tone. A proper prep-to-finish sequence — clean, dye, seal — also extends how long the color holds under trail and arena use conditions.
Leather Dyes & Stains — Common Questions Answered
Explore related products: Western Tack | Headstalls | Breast Collars | Horse Supply